

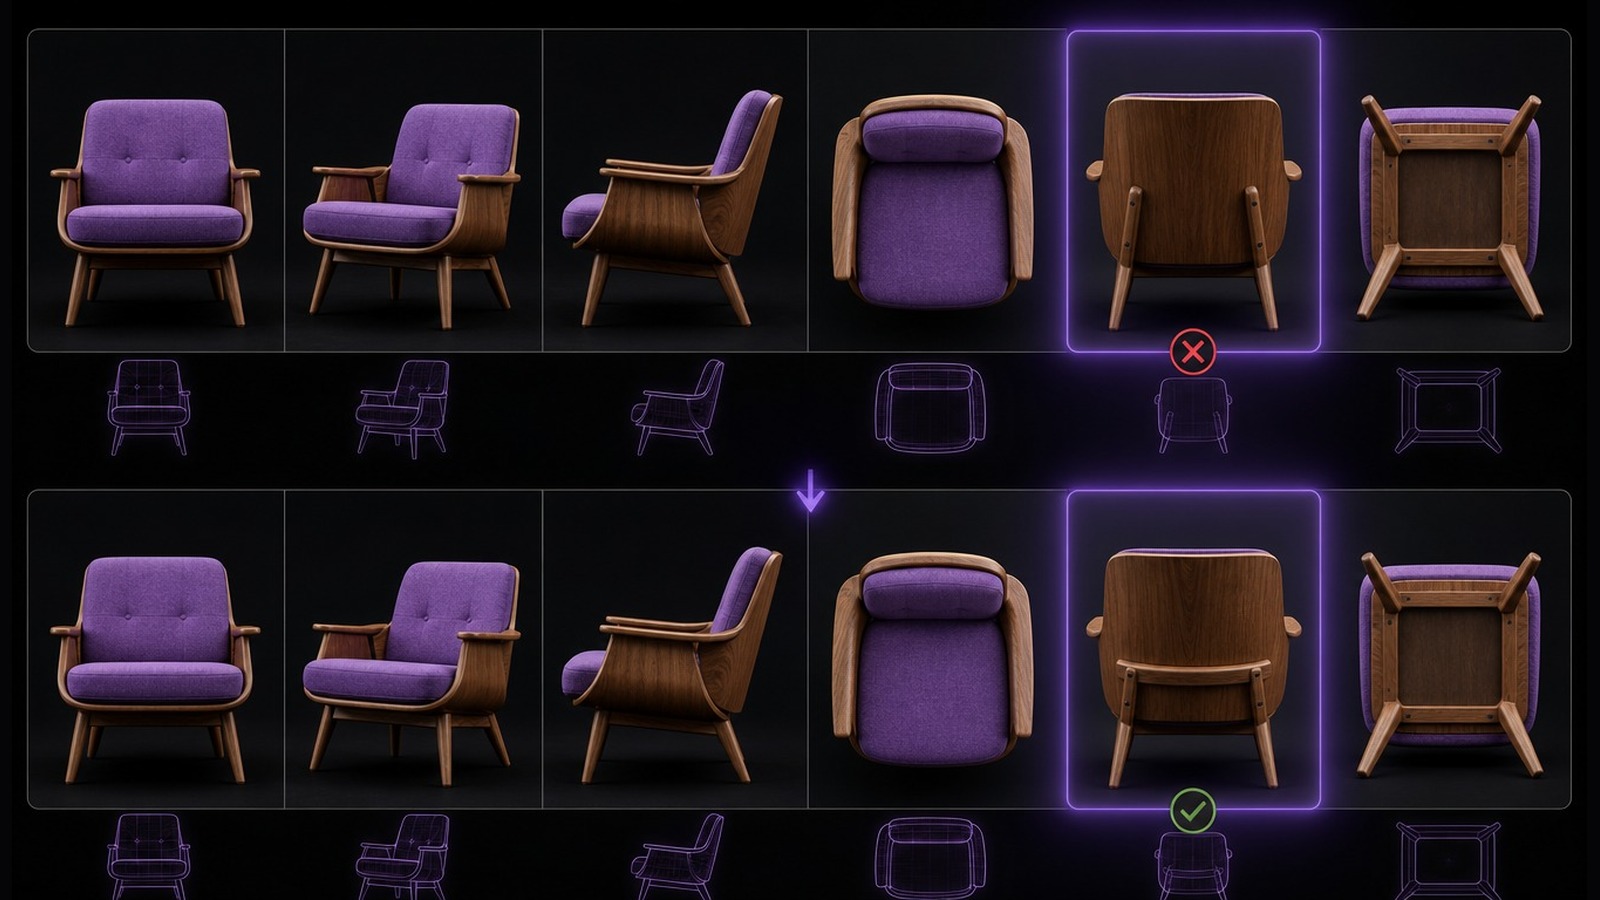
A mismatched view should be fixed by finding the image that describes a different shape, direction, or object state, then changing only that input before generating again. This controlled comparison makes it easier to tell whether the new reference resolved the geometry conflict.
Open the Neural4D Multi-View to 3D workspace when you are ready to inspect or rebuild the input set.
Open Multi-View to 3D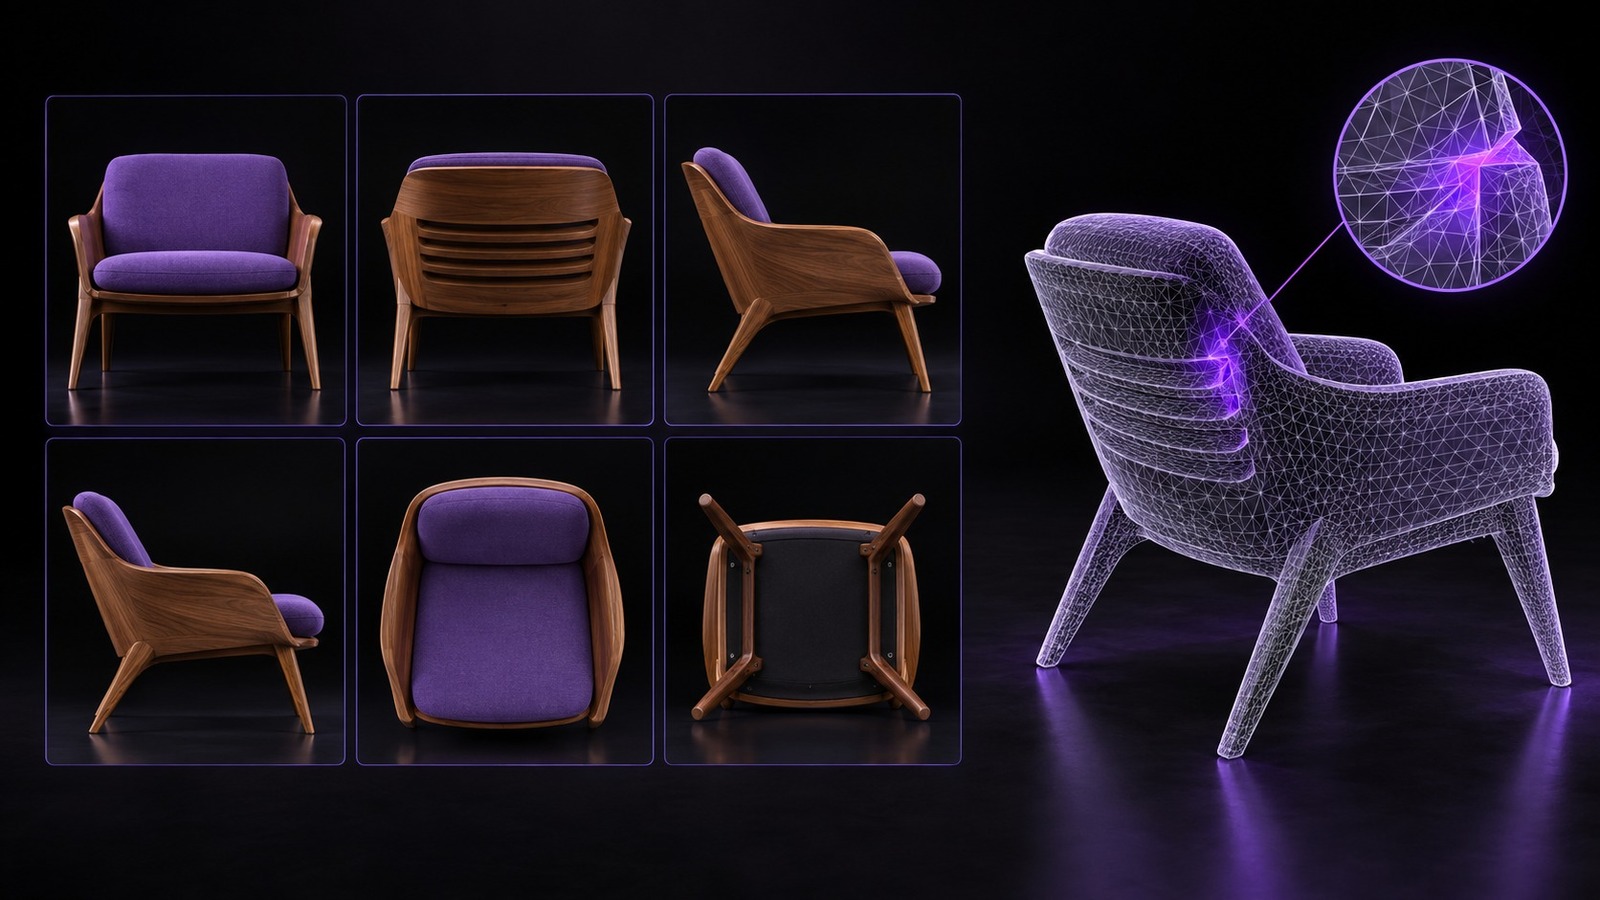
Multi-view generation uses the complete reference set to infer one object. Neural4D can accept up to six orthogonal directions, including front, back, left, right, top, and bottom. Every image should therefore describe the same physical object, design version, proportions, and movable-part configuration.
If one image shows a different backrest, handle position, accessory, or mirrored construction, the references no longer describe one unambiguous shape. The resulting model may combine incompatible evidence instead of choosing the image you intended to prioritize.
| Visible symptom | Likely input conflict | First check |
|---|---|---|
| Front looks correct, back is distorted | The rear image shows a different design or is assigned to the wrong direction | Compare the rear silhouette and attachment points with both side views |
| Left and right sides are unexpectedly different | One side image is mirrored, cropped, or from another product variant | Check asymmetric details such as controls, hinges, arms, and openings |
| A part appears twice | An accessory changes position between images | Compare movable parts and remove views from a different configuration |
| Overall proportions drift | One view has strong perspective distortion or inconsistent framing | Check camera angle, object scale, crop, and lens distortion |
Start with the most obvious failure area in the generated model, then trace that area back to the views that expose it. A damaged rear surface points first to the back and side references. An incorrect top opening points first to the top, front, and side references.
| Check | What must remain consistent | Corrective action |
|---|---|---|
| Object identity | Model, design revision, colorway, and installed accessories | Remove any image captured from another variant |
| Object state | Doors, lids, arms, cushions, wheels, and articulated parts | Use one fixed configuration across all references |
| Direction | The assigned slot matches the visible front, back, left, right, top, or bottom face | Move the image to the correct direction or replace it |
| Orientation | Left and right have not been reversed by mirroring | Restore the original orientation before upload |
| Framing | The full silhouette is visible at a comparable scale | Use an uncropped image with the complete object in frame |
| Visibility | Key geometry is not hidden by hands, props, glare, or deep shadows | Recapture the view or select a clearer reference |
For more general preparation guidance, review the Image to 3D Model input recommendations before rebuilding the set.
Review the complete set once before changing anything. The goal is to establish a stable baseline, not to improve every photograph at the same time.
Use a single-variable test. Replacing several inputs at once may improve the result, but it will not show which image caused the original conflict.
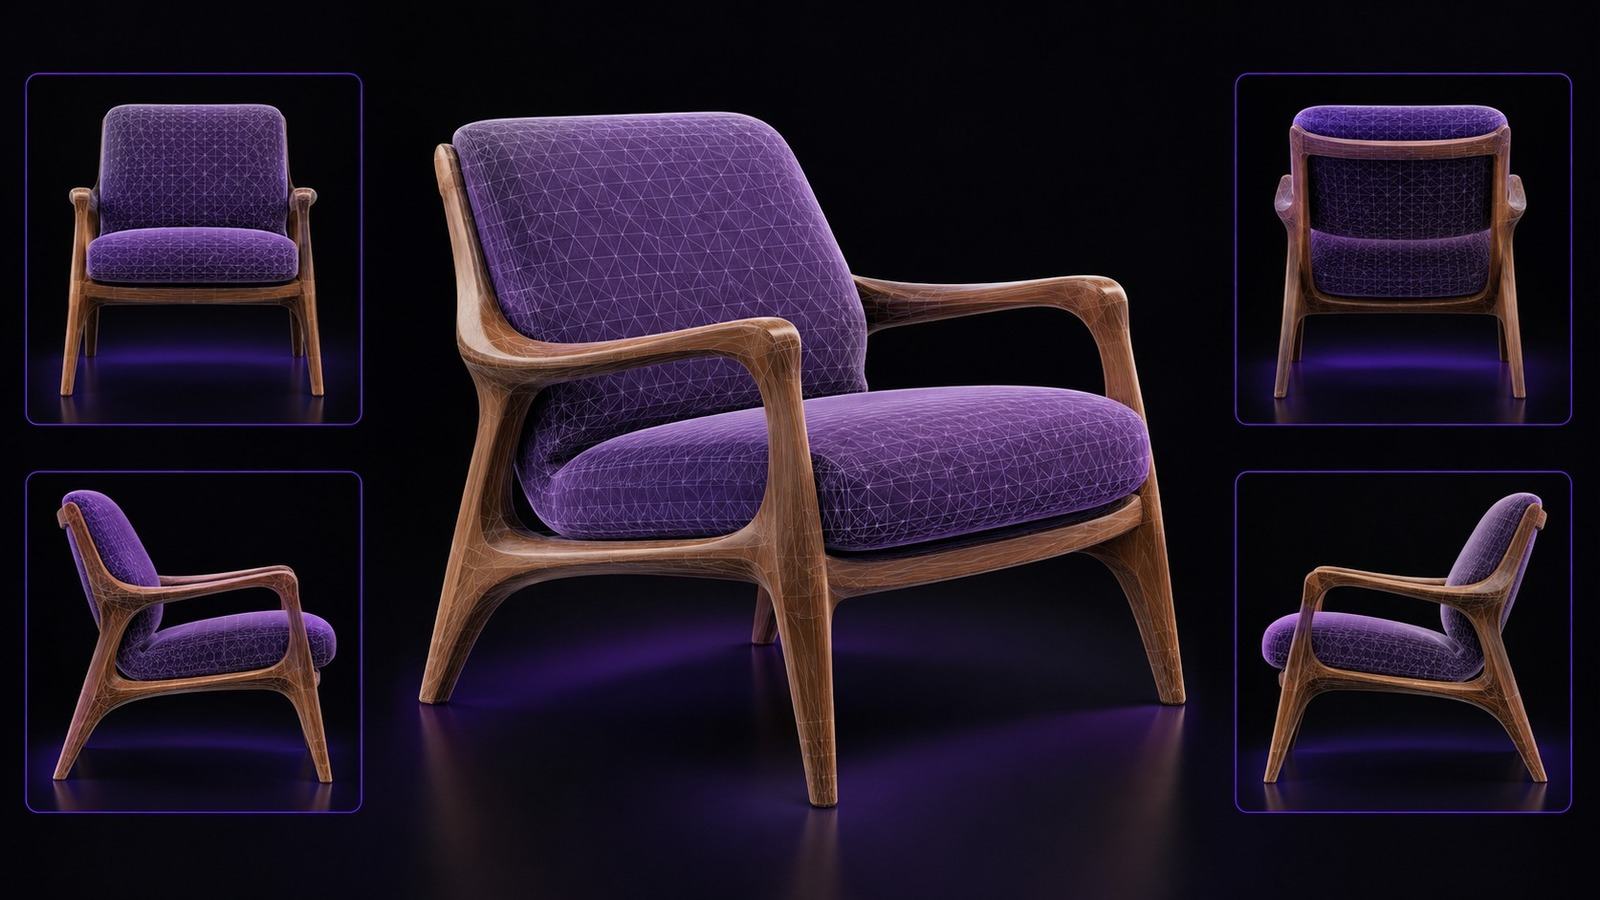
Do not judge the fix from a single attractive angle. Rotate the result and compare each major silhouette against the corresponding reference. A corrected front view does not prove that the back, underside, or thin structures are accurate.
| Inspection area | Pass condition | Reason to test again |
|---|---|---|
| Primary silhouette | Front, back, and side outlines agree with the intended design | Width, height, or curvature changes between directions |
| Repeated parts | Legs, arms, handles, and supports appear once and in the correct position | Parts are duplicated, fused, or missing |
| Openings and negative space | Holes, gaps, and spaces under furniture remain open where expected | An opening is filled or shifted |
| Thin geometry | Edges, straps, rails, and panels connect continuously | Thin parts break, twist, or change thickness |
| Print-critical surfaces | The model has continuous surfaces suitable for later print preparation | Visible gaps or ambiguous intersections remain |
After the geometry passes inspection, choose the file type required by your downstream tool. The current format options are documented in What 3D file formats does Neural4D support?
For furniture reconstruction, compare the seat height, backrest angle, leg spacing, arm thickness, and the negative space below the seat. These relationships often reveal a mismatched side or rear reference before surface detail does.
For SLA or FDM preparation, inspect closed surfaces, part thickness, small connectors, and the continuity of load-bearing features. Multi-view correction improves the source geometry, but print orientation, wall thickness, supports, and machine tolerances still require a separate manufacturing check.
Keep the evidence needed to reproduce the problem. Send the complete reference set, the direction assigned to each image, the asset or task ID, screenshots from the same inspection angles, and a short test log showing which image was removed or replaced.
Also state whether the error appears in the generated geometry, the texture, or both. This prevents a geometry mismatch from being confused with a material alignment issue.
No. Use only clear views that show the same object configuration. Neural4D supports up to six orthogonal directions, but an extra image can reduce consistency when it conflicts with the rest of the set.
Yes, if the remaining views still describe the important geometry. Compare a generation without the suspect image against a generation with a corrected replacement, then keep the set that produces the more stable shape.
A mirrored image reverses left and right structure. If the other references are not mirrored, the set describes two incompatible versions of the object and can produce duplicated or asymmetric parts.
Background changes are usually less important than geometry changes, but strong shadows, reflections, clutter, or cropped edges can hide the silhouette and make a view harder to interpret.
Yes. Keep movable parts, accessories, proportions, and construction details unchanged. Camera position should change between views, but the physical state of the object should not.
Send the complete reference set, the direction assigned to each image, the asset or task ID, screenshots of the incorrect result, and a short record of which view you replaced or removed.
Return to Neural4D 3D Studio with the corrected reference set, change one input at a time, and compare the regenerated geometry from the same inspection angles.
Try Neural4D for Free
'%3e%3cg%3e%3cpath%20d='M14.22126,2L16.980341,2L10.922359,8.365314L18,17.000000999999997L12.44585,17.000000999999997L8.0973005,11.7527676L3.1189604,17.000000999999997L0.35988006,17.000000999999997L6.7777414,10.1918821L0,2L5.6921029,2L9.6207924,6.7933583L14.22126,2ZM13.255582,15.505536L14.785071,15.505536L4.88837,3.4391145L3.2449181,3.4391145L13.255582,15.505536Z'%20fill='%23ffffff'%20fill-opacity='1'%20style='mix-blend-mode:passthrough'/%3e%3c/g%3e%3c/g%3e%3c/svg%3e)
'%3e%3cg%3e%3cg%3e%3cpath%20d='M17.776579953674315,4.238972914697266C18.530987953674316,2.8357112146972656,17.668764953674316,1.0000038146972656,17.668764953674316,1.0000038146972656C15.728984953674317,1.0000038146972656,14.327326953674316,2.2953194146972655,14.327326953674316,2.2953194146972655C13.572919953674317,1.8635447646972656,11.093512553674316,1.8635447646972656,11.093512553674316,1.8635447646972656C11.093512553674316,1.8635447646972656,8.614197253674316,1.8635447646972656,7.859790753674316,2.2953194146972655C7.859790753674316,2.2953194146972655,6.4587898536743165,1.0000038146972656,4.518257353674317,1.0000038146972656C4.518257353674317,1.0000038146972656,3.6561312536743165,2.8350313146972654,4.410538953674316,4.238972914697266C4.410538953674316,4.238972914697266,2.6862124236743163,5.858135714697266,3.332825653674316,9.312969214697265C3.9408041536743164,12.559363814697265,6.782133553674316,13.415479814697266,8.614197253674316,13.415479814697266C8.614197253674316,13.415479814697266,7.859790753674316,14.063154814697265,7.967603653674316,15.142524814697266C7.967603653674316,15.142524814697266,6.889853453674316,15.790198814697266,5.812196053674317,15.358415814697265C4.734538553674316,14.926723814697265,4.1956536536743165,13.847263814697266,4.1956536536743165,13.847263814697266C4.1956536536743165,13.847263814697266,3.1179590536743165,12.443964814697265,2.0402743556743164,12.983694814697266C2.0402743556743164,12.983694814697266,1.7169677936743164,13.307532814697266,2.9024282136743165,13.847263814697266C2.9024282136743165,13.847263814697266,3.7645722536743165,15.142524814697266,4.087878753674316,15.898144814697266C4.411195253674316,16.653767814697268,6.135446553674316,17.301444814697266,7.860446953674316,16.869661814697267L7.860446953674316,19.352327814697265C7.860446953674316,19.352327814697265,7.860446953674316,19.568219814697265,7.4293847536743165,19.676166814697265C6.998322453674317,19.784110814697264,6.998322453674317,20.000003814697266,7.213853853674316,20.000003814697266L14.974576953674317,20.000003814697266C15.190109953674316,20.000003814697266,15.190109953674316,19.784110814697264,14.759046953674316,19.676166814697265C14.327983953674316,19.568219814697265,14.327983953674316,19.352327814697265,14.327983953674316,19.352327814697265L14.327983953674316,16.869661814697267C14.327983953674316,16.869661814697267,14.337451953674316,15.575053814697265,14.327983953674316,15.142524814697266C14.304263953674317,14.057753814697266,13.573576953674316,13.415479814697266,13.573576953674316,13.415479814697266C15.405640953674316,13.415479814697266,18.246925953674317,12.559363814697265,18.854893953674317,9.312969214697265C19.501579953674316,5.858135714697266,17.777234953674316,4.238972914697266,17.776579953674315,4.238972914697266L17.776579953674315,4.238972914697266Z'%20fill='%23ffffff'%20fill-opacity='1'%20style='mix-blend-mode:passthrough'/%3e%3c/g%3e%3c/g%3e%3c/g%3e%3c/svg%3e)


