
The AI Texture feature lets you apply high-quality, photorealistic textures to any 3D model using a single reference image. Instead of manually painting materials or searching texture libraries, you simply upload a 2D image containing the surface style you want, and Neural4D transfers it directly onto your mesh.
This is especially powerful in furniture design and manufacturing workflows, where material accuracy matters. A furniture designer can upload a wood grain photo to instantly texture a chair model with the exact finish required for a client presentation or 3D print specification. The same workflow applies to product enclosures, decorative tiles, architectural surfaces, and custom props for game or XR projects.
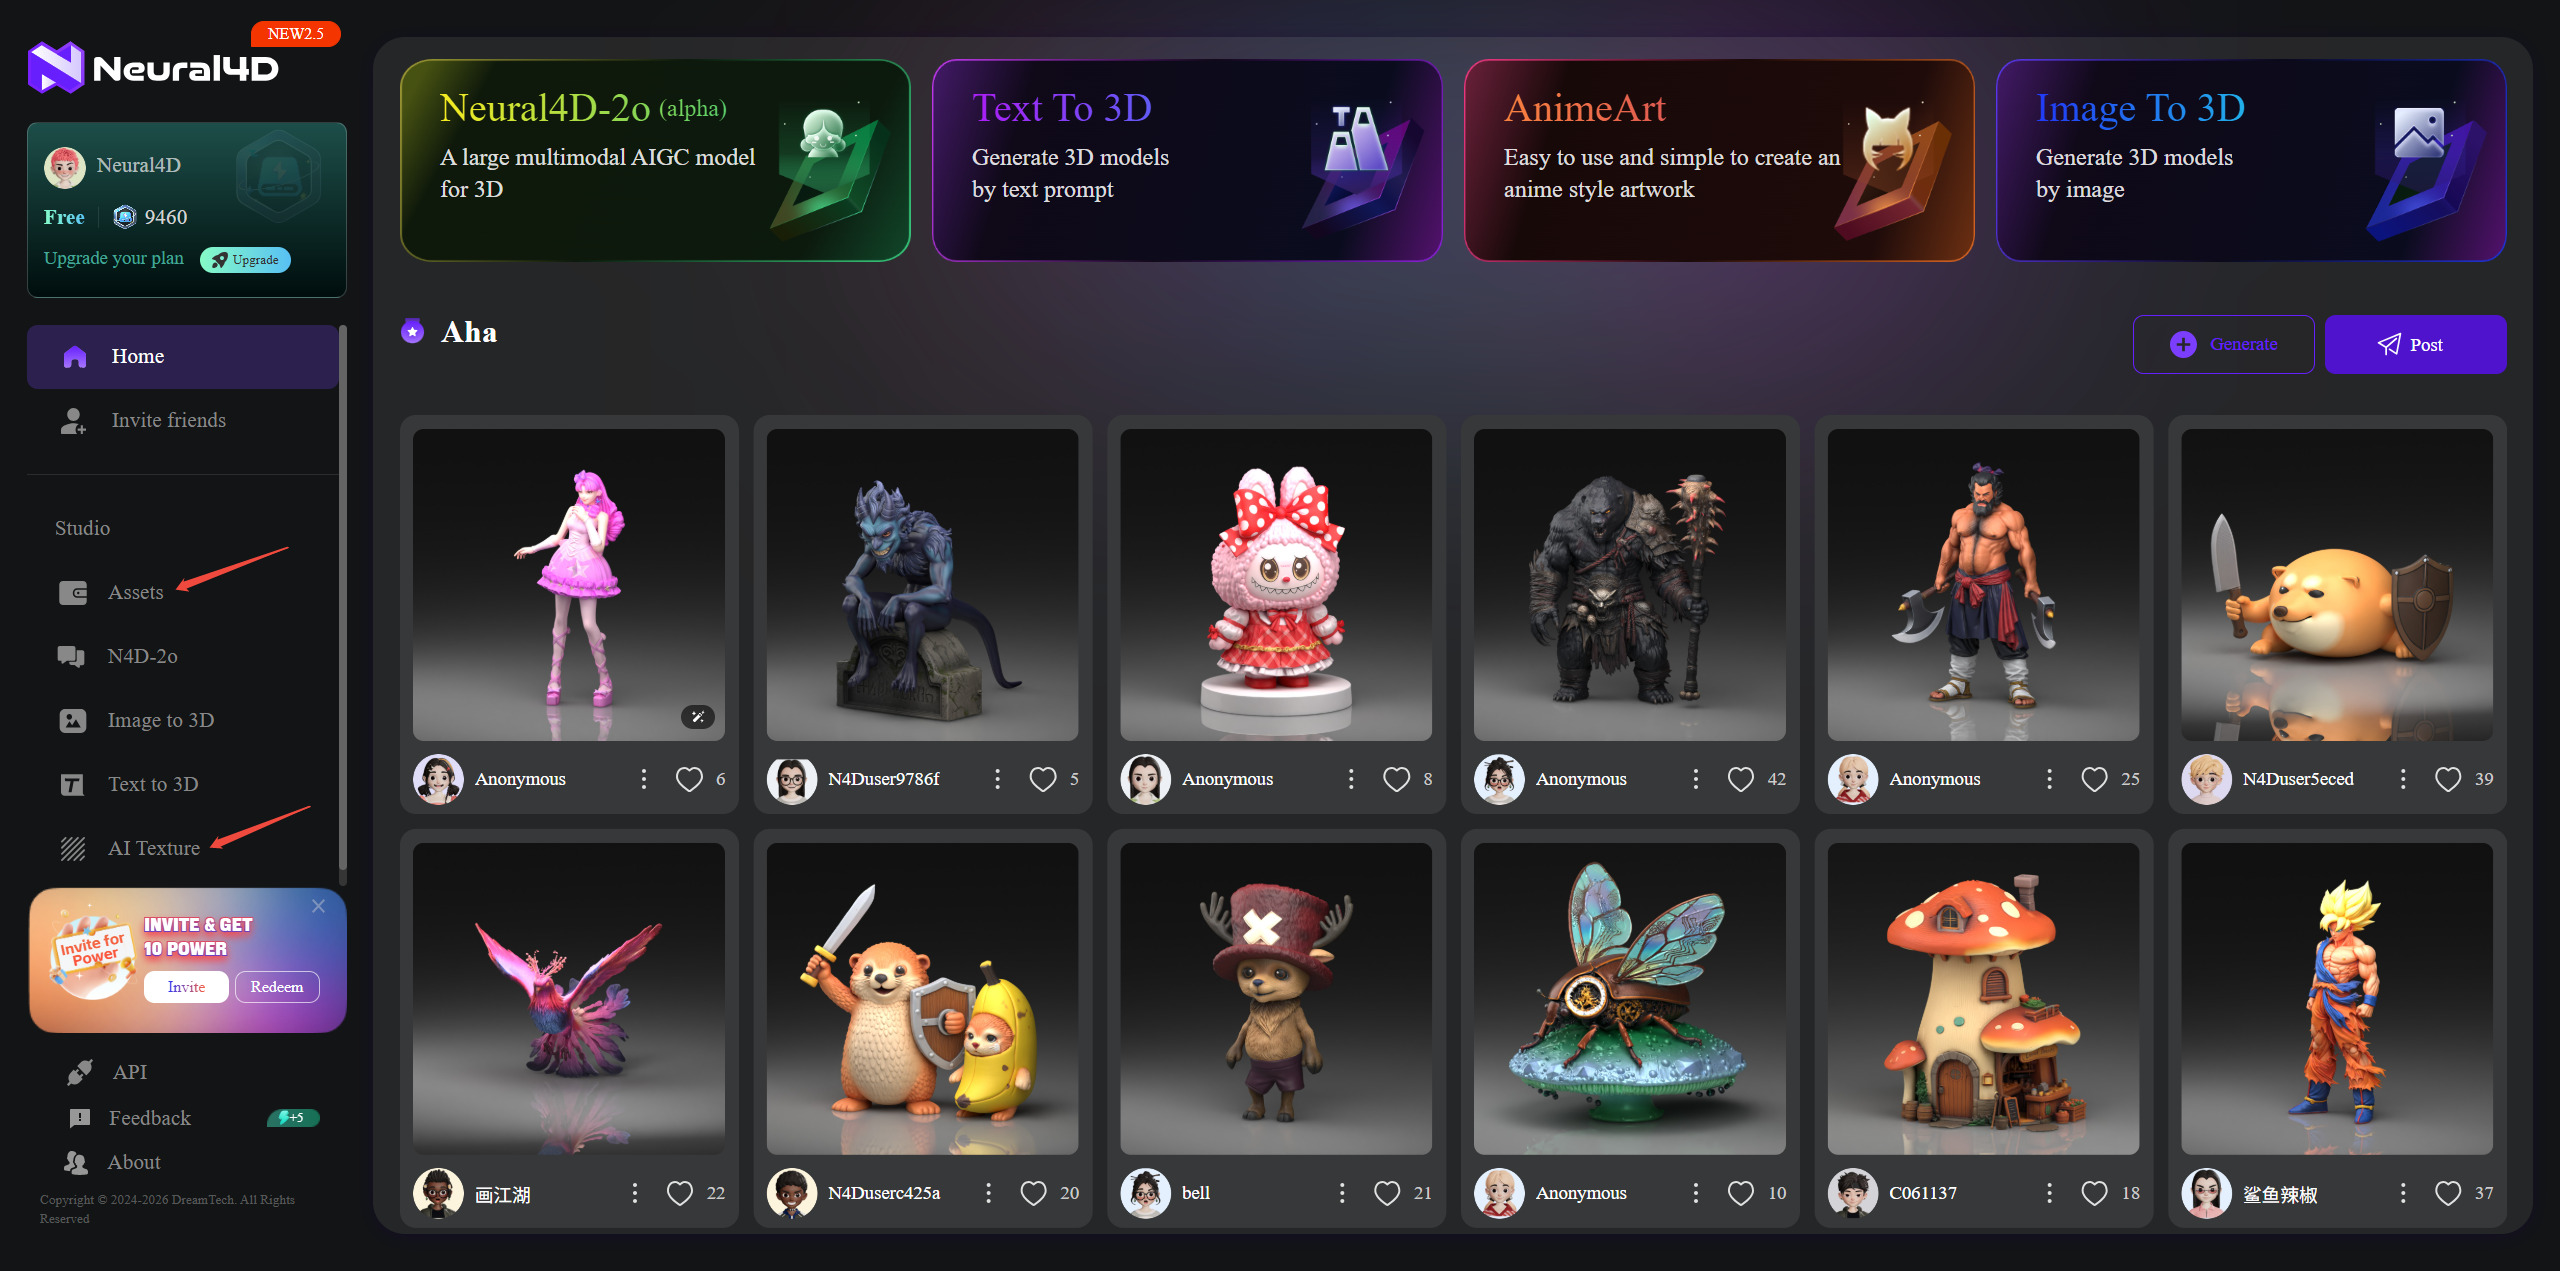
You can open the AI Texture interface through two paths:
| Access Path | How to Navigate |
|---|---|
| Sidebar Menu | In the Neural4D Studio, click the AI Texture icon (slashed square) under the Studio section in the left sidebar. |
| Model Details | Open any previously generated model from your model library and click the AI Texture button within its details page to texture that specific model directly. |
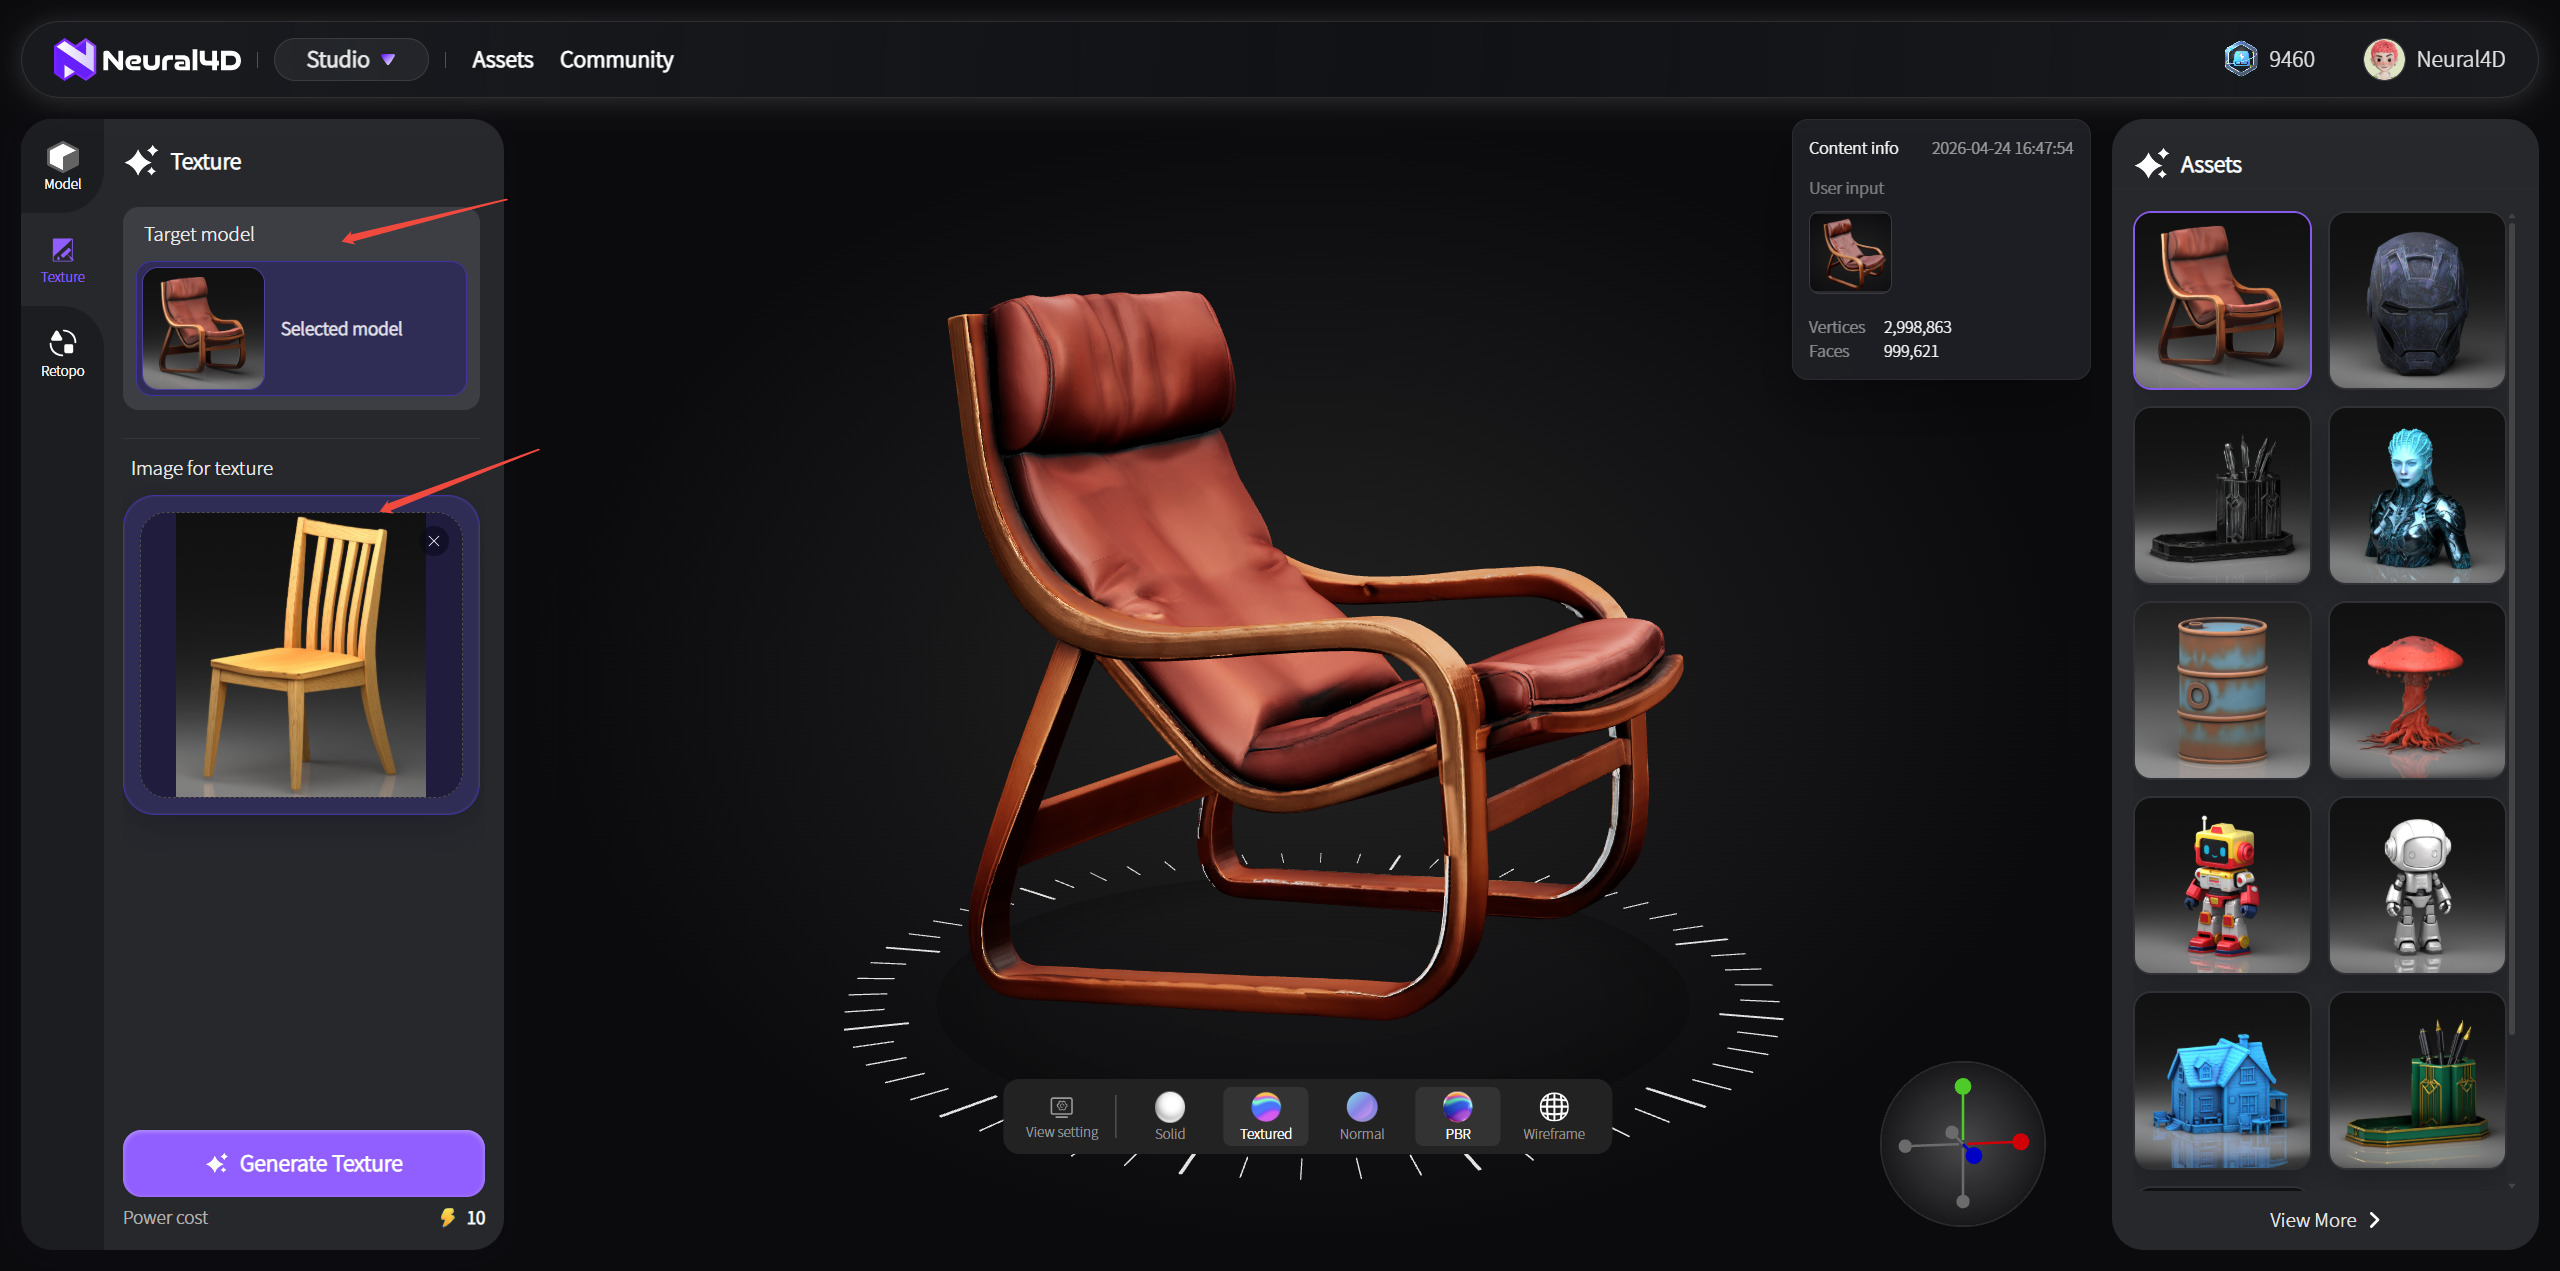
Inside the AI Texture interface, complete the two required inputs before generating:
| Input Phase | Required Action & Guidelines |
|---|---|
| 1. Select Reference Model | Click the selection box to choose a 3D model from your library. This mesh serves as the base for texturing. All previously generated Neural4D models are available for use. |
| 2. Upload Reference Image | In the Image for texture area, upload a 2D image of the desired material. For manufacturing, high-resolution swatches with flat perspective and clear lighting produce the most accurate results. |
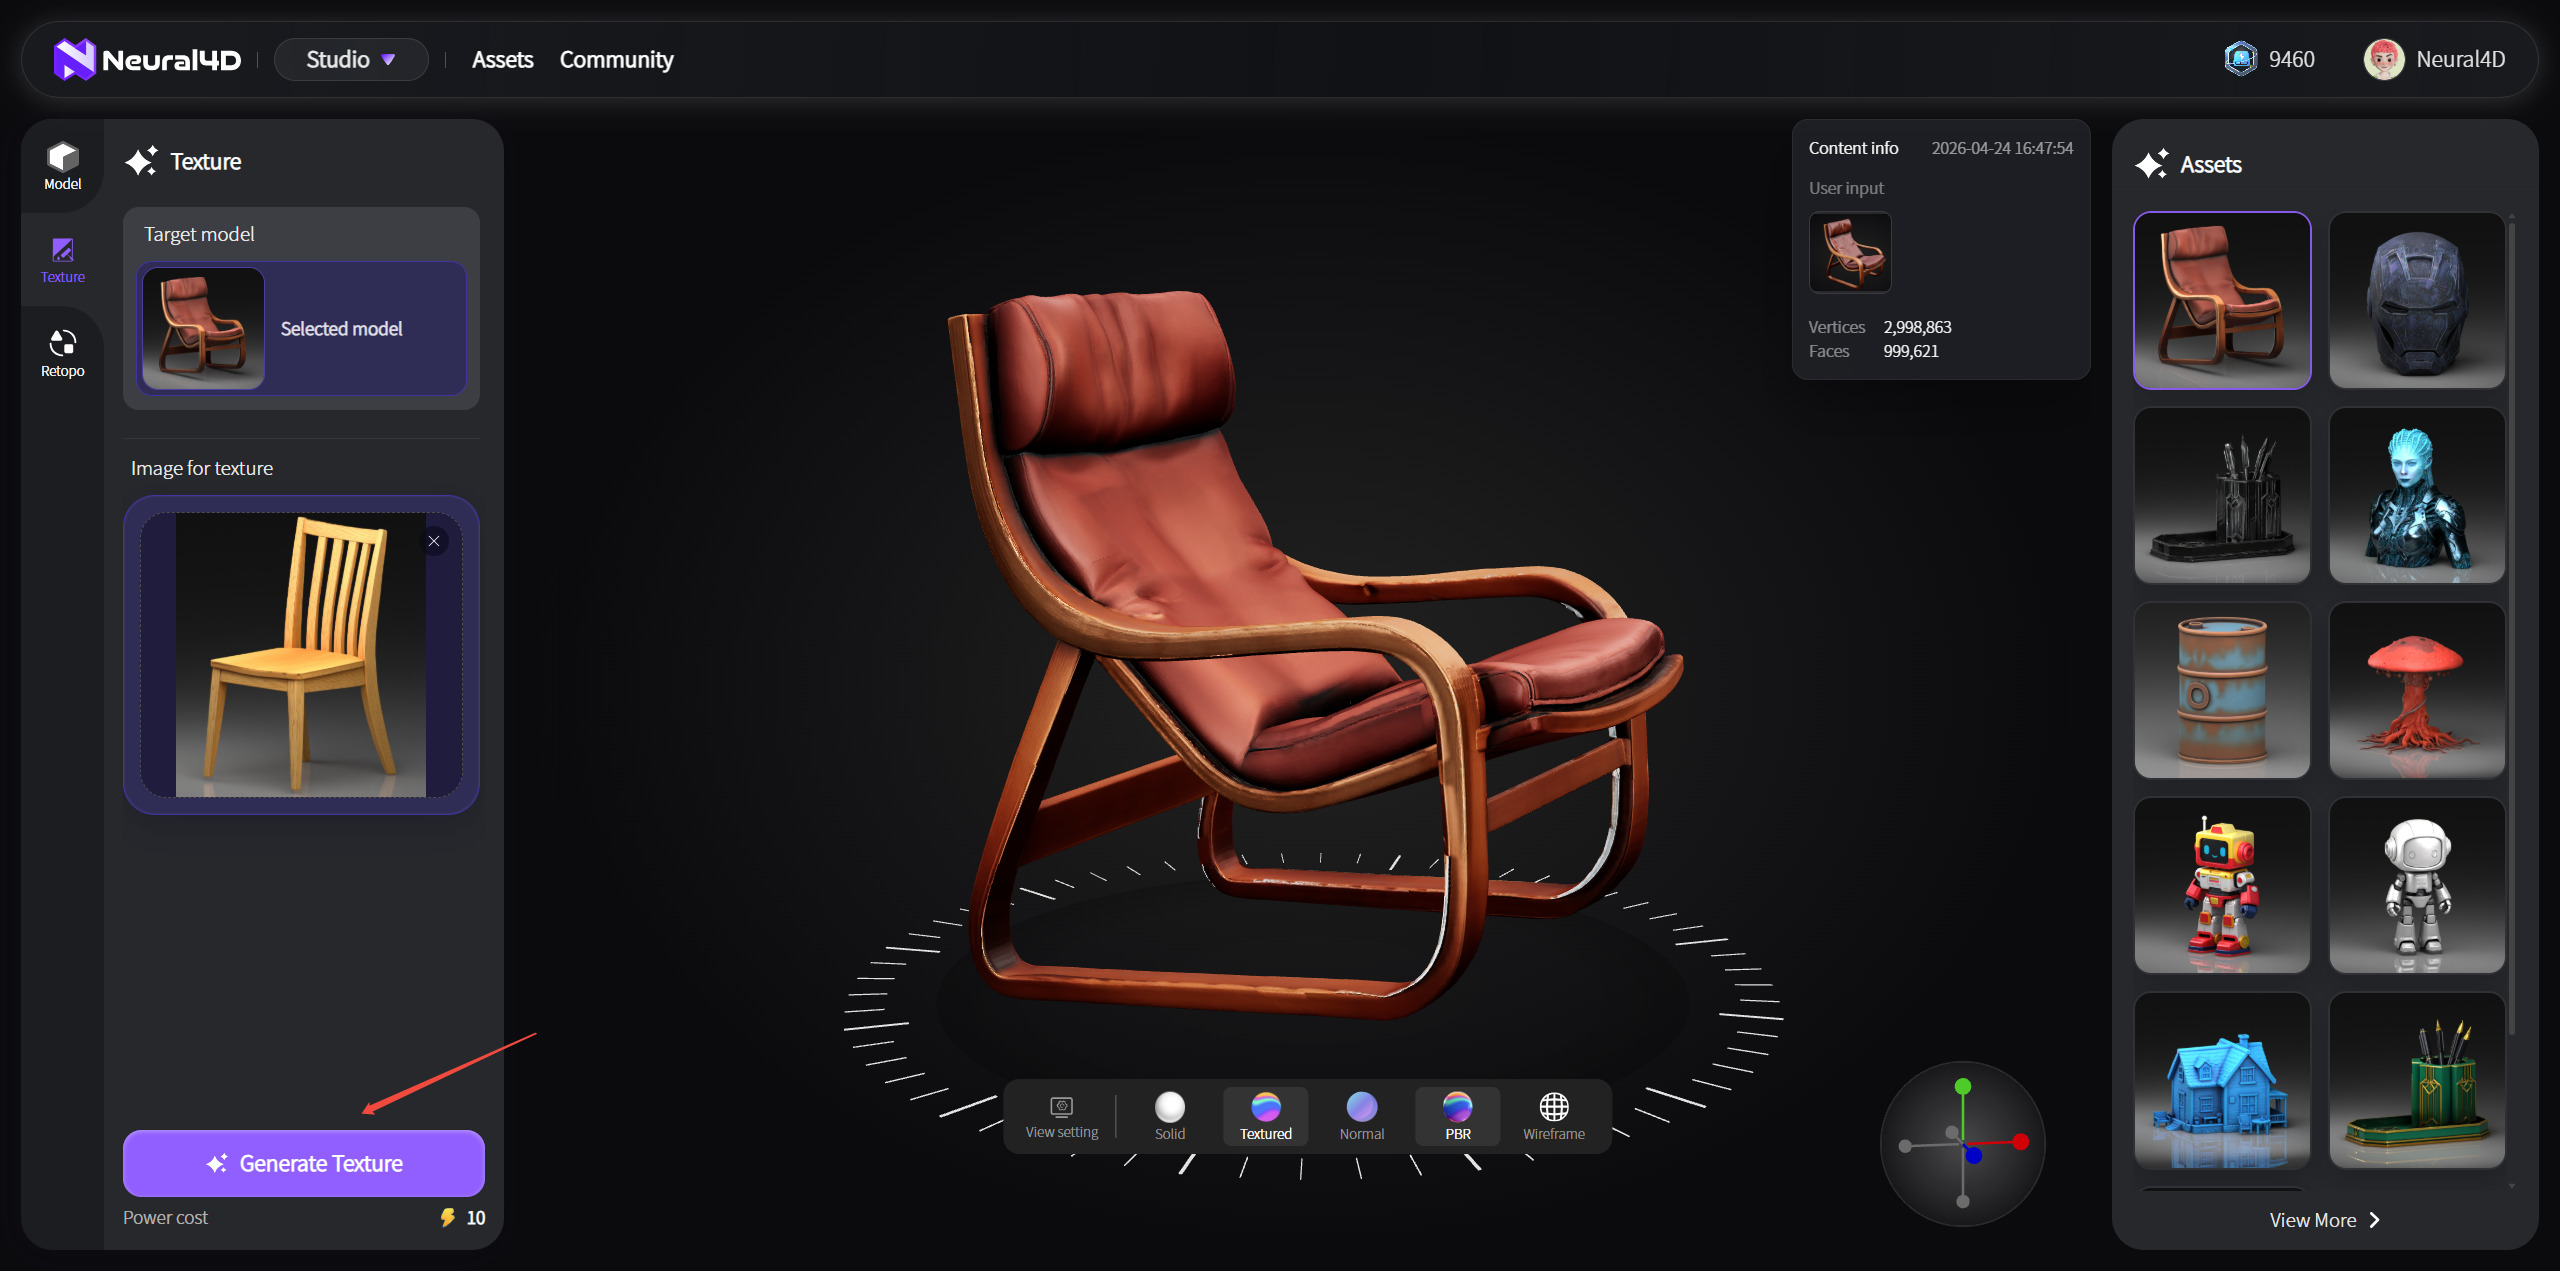
Once you have selected your base model and uploaded the reference material, simply click the Generate button.
| Action | Cost | Result |
|---|---|---|
| Generate Texture | 10 Power credits | A new 3D model with the applied texture will be created and displayed in the viewer. |
Each generation task costs 10 Power credits. Neural4D will process your request, and the results will appear in the 3D viewer for your inspection.
Once you are satisfied with the generated texture variations, click the Download icon to export. Neural4D supports all six standard 3D formats:
| Format | Best For |
|---|---|
| .STL | Direct 3D printing. Industry standard for manufacturing and prototyping workflows. |
| .OBJ | Universal mesh exchange: widely supported by CAD tools, Blender, Maya, and game engines. |
| .FBX | Animation-ready format: preferred for Unity and Unreal Engine pipelines with rigging support. |
| .GLB | Real-time rendering and XR previewing: compact binary format optimized for web and headset delivery. |
| .USDZ | Apple ecosystem AR: used for AR Quick Look on iOS and macOS for product visualization. |
| .BLEND | Blender native format: preserves full scene data including materials and hierarchy for continued editing. |

Note: The AI Texture tool currently generates textures based solely on your uploaded reference image. It does not support text-based prompts or style presets at this time.
Try AI Texture Free'%3e%3cg%3e%3cpath%20d='M14.22126,2L16.980341,2L10.922359,8.365314L18,17.000000999999997L12.44585,17.000000999999997L8.0973005,11.7527676L3.1189604,17.000000999999997L0.35988006,17.000000999999997L6.7777414,10.1918821L0,2L5.6921029,2L9.6207924,6.7933583L14.22126,2ZM13.255582,15.505536L14.785071,15.505536L4.88837,3.4391145L3.2449181,3.4391145L13.255582,15.505536Z'%20fill='%23ffffff'%20fill-opacity='1'%20style='mix-blend-mode:passthrough'/%3e%3c/g%3e%3c/g%3e%3c/svg%3e)
'%3e%3cg%3e%3cg%3e%3cpath%20d='M17.776579953674315,4.238972914697266C18.530987953674316,2.8357112146972656,17.668764953674316,1.0000038146972656,17.668764953674316,1.0000038146972656C15.728984953674317,1.0000038146972656,14.327326953674316,2.2953194146972655,14.327326953674316,2.2953194146972655C13.572919953674317,1.8635447646972656,11.093512553674316,1.8635447646972656,11.093512553674316,1.8635447646972656C11.093512553674316,1.8635447646972656,8.614197253674316,1.8635447646972656,7.859790753674316,2.2953194146972655C7.859790753674316,2.2953194146972655,6.4587898536743165,1.0000038146972656,4.518257353674317,1.0000038146972656C4.518257353674317,1.0000038146972656,3.6561312536743165,2.8350313146972654,4.410538953674316,4.238972914697266C4.410538953674316,4.238972914697266,2.6862124236743163,5.858135714697266,3.332825653674316,9.312969214697265C3.9408041536743164,12.559363814697265,6.782133553674316,13.415479814697266,8.614197253674316,13.415479814697266C8.614197253674316,13.415479814697266,7.859790753674316,14.063154814697265,7.967603653674316,15.142524814697266C7.967603653674316,15.142524814697266,6.889853453674316,15.790198814697266,5.812196053674317,15.358415814697265C4.734538553674316,14.926723814697265,4.1956536536743165,13.847263814697266,4.1956536536743165,13.847263814697266C4.1956536536743165,13.847263814697266,3.1179590536743165,12.443964814697265,2.0402743556743164,12.983694814697266C2.0402743556743164,12.983694814697266,1.7169677936743164,13.307532814697266,2.9024282136743165,13.847263814697266C2.9024282136743165,13.847263814697266,3.7645722536743165,15.142524814697266,4.087878753674316,15.898144814697266C4.411195253674316,16.653767814697268,6.135446553674316,17.301444814697266,7.860446953674316,16.869661814697267L7.860446953674316,19.352327814697265C7.860446953674316,19.352327814697265,7.860446953674316,19.568219814697265,7.4293847536743165,19.676166814697265C6.998322453674317,19.784110814697264,6.998322453674317,20.000003814697266,7.213853853674316,20.000003814697266L14.974576953674317,20.000003814697266C15.190109953674316,20.000003814697266,15.190109953674316,19.784110814697264,14.759046953674316,19.676166814697265C14.327983953674316,19.568219814697265,14.327983953674316,19.352327814697265,14.327983953674316,19.352327814697265L14.327983953674316,16.869661814697267C14.327983953674316,16.869661814697267,14.337451953674316,15.575053814697265,14.327983953674316,15.142524814697266C14.304263953674317,14.057753814697266,13.573576953674316,13.415479814697266,13.573576953674316,13.415479814697266C15.405640953674316,13.415479814697266,18.246925953674317,12.559363814697265,18.854893953674317,9.312969214697265C19.501579953674316,5.858135714697266,17.777234953674316,4.238972914697266,17.776579953674315,4.238972914697266L17.776579953674315,4.238972914697266Z'%20fill='%23ffffff'%20fill-opacity='1'%20style='mix-blend-mode:passthrough'/%3e%3c/g%3e%3c/g%3e%3c/g%3e%3c/svg%3e)


